
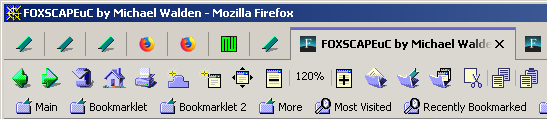
Fig. 1 - FOXSCAPEuC Cropped Screen Capture
FOXSCAPEuC - FOXSCAPE theme for Firefox userChrome.css by Michael Walden with help from Aris
A full featured retro theme for Firefox that makes Firefox look like Netscape 4.x, Netscape 6+ "Classic" theme, Mozilla Suite M18+, SeaMonkey 1.x "Classic" theme and FOXSCAPE theme running on Windows.
Download
2022-01-18: Unfortunately, due to changes in Firefox's user interface (Proton UI),
that I dislike, in version 89 and general bugginess in versions after 89,
I am not using Firefox any more. I am now using The SeaMonkey Internet
suite ( https://www.SeaMonkey-Project.org ). As a result of this, I am
unable to produce further versions of the FOXSCAPEuC theme. If someone
is interested in producing updates, I would be willing to host them on
this site if they just bring it to my attention in an email. Alternatively,
I could provide a link here to a web page that is hosting new versions
of FOXSCAPEuC, if that is what you prefer. Sorry for the bad news.
- Michael Walden
Main new feature(s):
- Various fixes to work in Firefox 85.0+
Known issues:
- The downloads-button in the navigation bar Overflow Menu popup shows in only one icon state (no hover or active)
- The new Firefox Account Button only shows in the small 16x16 pixel size
- Tab favicon jumps to the right momentarily just before page loading finishes only on certain web pages.
This only occurs when using the following five functions:
tab_bar_tabs_without_a_favicon_skinned_-_style_1.css - tab_bar_tabs_without_a_favicon_skinned_-_style_5.css
Introduction
At a time when all hope seems lost for Firefox having "Complete" (Heavyweight) themes, I have discovered that almost complete themes are again possible. Thanks to the excellent work of Aris, creator of the now obsolete (in the current Firefox) Classic Theme Restorer Firefox add-on, and creator of the newer Custom CSS tweaks for Firefox Quantum where he clearly demonstrates how to create almost complete themes by use of the Firefox userChrome.css file! On finding this out I decided to see if I could make FOXSCAPE work with the new Firefox. I feel that I was able to achieve a pretty good result with the new FOXSCAPEuC (uC for userChrome.css). Unfortunately, the changes in Firefox since the final release of FOXSCAPE 5.18 (2014-03-23) prevent me from making things look as close to the Netscape look as it used to look. Remember, something is better than nothing. This is still a work in progress. I will continue to see if I can improve things, time permitting.
How to install FOXSCAPEuC in Firefox
Note: the following instructions assume you know basic computing skills such as how to open a folder, how to unzip a file, etc.. If you do not know these types of things, consult someone with more experience to help you. It is not in the scope of these instructions to cover that stuff.
- In Firefox put "about:support" in the address bar (without the quote marks) and push the Enter or Return key.
- On Windows: To the right of "Profile Folder" click on [Open Folder]
On Linux: To the right of "Profile Directory" click on [Open Directory]
- Now open an existing "chrome" folder or make a new one and open it.
- Set your operating system to display files and file extensions which are hidden by default on Microsoft Windows and Apple macOS.
If you do not know how to do this, visit this web page and read section "(4)".
- If a "userChrome.css" file exists, rename it to something else, such as "my_userChrome.css".
- If a "userContent.css" file exists, rename it to something else, such as "my_userContent.css".
- Download (see above) and unzip the "FOXSCAPEuC 20XX-XX-XX vX FxXXXX.zip" file into the chrome folder.
- In Firefox put "about:config" in the address bar (without the quote marks) and push the Enter or Return key.
- If you get a screen stating "This might void your warranty!", then click on the [ I accept the risk! ] button.
- On the about:config page, put toolkit.legacyUserProfileCustomizations.stylesheets in the Search: field at the top of the page.
- If the value column has false in it, double click false to make it show true. Otherwise, go to the next step.
- Close the about:config page.
- Restart Firefox by going to "about:profiles" and by clicking on the [Restart normally...] button.
User Interface Customization
- Right click on the "Open menu" button, which now looks like the Netscape N logo, and choose Customize...
- At the lower left place a check mark in the "[✓] Title Bar" (by clicking it) to make the Tab Bar have a Netscape like appearance.
- At the lower left click on "Toolbars" and optionally enable "Menu Bar" or "Bookmarks Toolbar."
- At the lower left click on "Themes" and choose "Default" or "Light". "Dark" does not look good. On Windows 7 (with Windows Classic Theme) Default looks the best.
- At the lower left click on "Density" and choose "Compact", "Normal", or "Touch" whichever you prefer. "Compact" has small button icons, "Normal" and "Touch" have larger button icons.
- Now, drag and drop buttons from the customize page onto the toolbars, or vice versa (such as for the two Flexible Space rectangles), to produce a layout that you prefer.
I suggest the following buttons, in left to right order, to produce a Netscape like layout with all of the buttons that are skinned with the Netscape like bitmapped icons.
- Back
- Forward
- Reload / Stop
- Home
- Print
- New Tab (From right end of tabs bar)
- New Window
- Full Screen
- Zoom Controls (Zoom-out, Reset, Zoom-in)
- Downloads
- Bookmarks Menu
- History
- Edit Controls (Cut, Copy, Paste)
The following vector drawn buttons are all colorized with a color blue that matches nicely with the Netscape like icons listed above. You can optionally place any of these buttons on the toolbars.
- Library
- Sidebars
- New Private Window
- Open File
- Save Page
- Find
- Email Link
- Text Encoding
- Synced Tabs
- Add-ons
- Options
- Developer
- WebIDE (Hidden by default. Press Ctrl+Shift+I to reveal)
- Forget
- Firefox Account
Once you have a layout that you are happy with, click the [Done] button in the lower right corner.
userChrome.css and/or userContent.css Customization
Further customization can be acomplished by editing the "userChrome.css" and/or "userContent.css" files in your chrome folder using a text editor. On Windows I recommend the Notepad++ text editor.
If you intend to investigate the many functions available in the "userChrome.css" and/or "userContent.css" files, you may create a desktop shortcut (alias) to the chrome folder, or to those two .css files for easier access in the future.
To enable a function of the theme in "userChrome.css" and/or "userContent.css", change the following example disabled function...
/* @import "./foxscapeuc/sub/description_of_function_to_enable_or_disable.css"; /**/
...into an enabled function, by removing the "/*" from the left end, to produce the following:
@import "./foxscapeuc/sub/description_of_function_to_enable_or_disable.css"; /**/
The reverse also works: to disable an enabled function of the theme, add a "/*" to the left end of the function.
Be sure to read the text above the functions in "userChrome.css" and/or "userContent.css" to follow the instructed rules, such as "Enable one of the following."
After making changes to "userChrome.css" and/or "userContent.css", you need to restart Firefox for the changes to take effect. Do so by going to "about:profiles" and click on [Restart normally...]
Convenient Restarts
For your convenience, if you intend to experiment with the "userChrome.css" and/or "userContent.css" files, you may want to create a bookmark to "about:profiles" (and name it "Restart") and place it on the bookmarks toolbar. Doing so will enable you to restart Firefox in two clicks, first on the bookmark and second on the [Restart normally...] button. To create a bookmark, open "about:profiles" and left mouse click + hold and drag the page proxy icon (located at the left end of the location bar) to a blank spot on the bookmarks toolbar and release the left mouse button. You can optionally rename the "About Profiles" bookmark to "Restart" by right mouse clicking on the bookmark and left mouse click on Properties at the bottom of the popup menu. Change the Name: to "Restart" and left click [Save] to save your change.
Alternatively, if you do not have the bookmarks toolbar visible, you can also pin a tab to "about:profiles". Doing so will enable you to restart Firefox in two clicks, first on the pinned tab on the left end of the tab bar and second on the [Restart normally...] button. To pin a tab, open "about:profiles" and right mouse click on the "About Profiles" tab and then left mouse click on "Pin Tab" on the popup menu to creat the pinned tab.
Customization Backup Procedure
Unfortunately, there is a problem with customizing using the "userChrome.css" and/or "userContent.css" files. These files are supplied with each release of FOXSCAPEuC. If you have performed some customization on these files, and then wish to update to a new version of FOXSCAPEuC, you will need to replace the old customized files with the new un-customized files from the updated FOXSCAPEuC. The reason you need to use the new files is because there will generally be newly added functions that did not exist in the older version of these files. This means that you will need to re-customize the new "userChrome.css" and/or "userContent.css" files to have the previously made changes in the old files. Since there are over 100 functions to customize in these files, it will be difficult to remember all of the changes that you may have made to your previous setup. To make this a less difficult situation, I recommend that you document in a separate "backup" text file all of the changes you make to the two files as you make each individual change. The backup file should contain a list made up of a copy of each line that you enable or disable in the two files. The process of reimplementing the customization changes involves searching for each line in the backup list in the un-customized new file and then make the appropriate enable or disable alteration to reproduce the prior setup. This should be a straightforward but somewhat laborious task. I apologize for there being no easier solution. There is the possibility that a function name may change, which means that your search will come up with nothing in the new file, in this case you will need to manually look for a similar sounding, but not identical, new function to try out. I will provide a list of added or changed functions in the change log for each new version of FOXSCAPEuC which will help you in finding changed functions. The "change_log.txt" file is located in the "foxscapeuc" folder in the .zip file.
Enjoy!
P.S. If you have any gripes, complements, questions, or anything else on your mind, please let me know by sending me an email by going to my contact page.
Menu
Mozilla and Firefox are registered trademarks of the Mozilla Foundation.
Netscape, Netscape Navigator and Netscape Communicator are registered trademarks of Netscape Communications.
Netscape's logos and Netscape product and service names are also trademarks of Netscape Communications.
Page last updated on: 2022-01-18 at 10:05 PM
[Validates as HTML 4.01 Transitional]
Counter: 11677 (Since 2019-04-02)